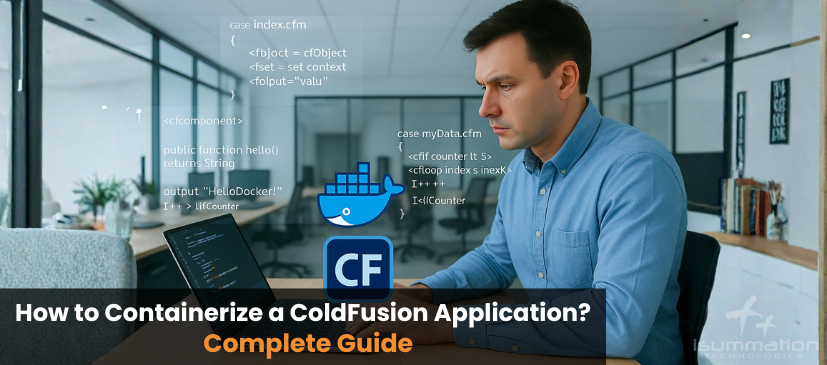
How to Containerize a ColdFusion Application?
Modernizing legacy applications is a common challenge for software development company.
Modernizing legacy applications is a common challenge for software development company. For many organizations relying on Adobe ColdFusion, the question isn’t whether to modernize, but how. Containerization with Docker offers a powerful solution, enabling developers to package applications with their dependencies into isolated, portable units. This approach streamlines deployment, improves scalability, and integrates seamlessly into a modern DevOps workflow.
Moving a traditional ColdFusion application into a containerized environment can seem daunting. However, the benefits in terms of consistency, efficiency, and easier maintenance are substantial. This guide will walk you through the process of containerizing a ColdFusion application, from setting up your Docker environment to building a custom image and deploying your container. We will cover the essential steps, best practices, and the technical details needed to make your ColdFusion migration a success.
By the end of this article, you will understand how to leverage Docker-based solutions to enhance your ColdFusion development lifecycle, making your enterprise software solution more robust and adaptable for the future.
Why Containerize Your ColdFusion Application?
Before going with the technical process, it’s essential to understand the value proposition. Containerization isn’t just about adopting new technology; it’s about solving fundamental problems in software deployment and maintenance. For ColdFusion developers, the advantages are particularly compelling.
Consistent Environments
One of the oldest problems in software development is the “it works on my machine” syndrome. Discrepancies between development, testing, and production environments can lead to bugs that are difficult to trace and fix. Docker containers solve this by encapsulating the application, the CFML framework, the web server, and all dependencies in a single, immutable image. This ensures that the application runs identically, regardless of where the container is deployed.
Simplified Deployment
Deploying a traditional ColdFusion web application often involves a complex, manual setup process. You need to install the correct version of the JRE, install and configure Adobe ColdFusion, set up your web server, and configure data sources. With a Docker-based approach, this entire process is scripted into a 𝙳𝚘𝚌𝚔𝚎𝚛𝚏𝚒𝚕𝚎. A single docker run command is all it takes to get a fully configured instance of your application up and running in seconds. This greatly simplifies the deployment process and reduces the chance of human error.
Enhanced Scalability
In a modern ColdFusion web app development landscape, applications must be able to handle fluctuating traffic loads. Containers are lightweight and start quickly, making them ideal for horizontal scaling. Using a container orchestration platform like Kubernetes or Docker Swarm, you can automatically scale the number of running containers up or down based on demand. This allows your ColdFusion application to handle traffic spikes efficiently without manual intervention.
Improved DevOps Workflow
Containerization is a cornerstone of modern DevOps practices. By integrating Docker into your continuous integration and continuous delivery (CI/CD) pipeline, you can automate the building, testing, and deployment of your ColdFusion application. This accelerates the development lifecycle, allowing you to deliver new features and bug fixes to users faster. A streamlined DevOps workflow leads to more reliable releases and frees up developers to focus on building great software.
Easier ColdFusion Maintenance
Managing multiple ColdFusion servers, each with its own configuration, can be a maintenance nightmare. Upgrading the ColdFusion version or applying security patches across all servers is a time-consuming and error-prone task. With containers, you simply update the base image in your 𝙳𝚘𝚌𝚔𝚎𝚛𝚏𝚒𝚕𝚎, rebuild your application image, and redeploy the new containers. This centralized approach to ColdFusion maintenance ensures consistency and security across all your environments.
Prerequisites for Containerization
To follow along with this guide, you will need a few things set up on your system:
- Docker Desktop: Install Docker Desktop for your operating system (Windows, macOS, or Linux). This will provide you with the Docker Engine, the docker command-line tool, and a graphical user interface for managing your containers.
- A ColdFusion Application: You should have a sample ColdFusion application ready to be containerized. This can be a simple project or an existing enterprise software solution.
- ColdFusion Installer: Download the appropriate Adobe ColdFusion installer for a Linux environment. Official Docker images are typically based on Linux, so you will need the .bin installer file. As we look toward future releases like ColdFusion 2025, having a containerization strategy will be even more critical.
Step-by-Step Guide to Containerizing ColdFusion
Now, let’s get to the practical steps of containerizing your application. The core of this process is creating a 𝙳𝚘𝚌𝚔𝚎𝚛𝚏𝚒𝚕𝚎, which is a text file containing the instructions to build a Docker image.
1. Setting Up Your Project Structure
First, organize your project files. A typical structure for a containerized ColdFusion project might look like this:
/𝚖𝚢-𝚌𝚏-𝚙𝚛𝚘𝚓𝚎𝚌𝚝
𝚊𝚙𝚙
𝙰𝚙𝚙𝚕𝚒𝚌𝚊𝚝𝚒𝚘𝚗.𝚌𝚏𝚌
𝚒𝚗𝚍𝚎𝚡.𝚌𝚏𝚖
(𝚢𝚘𝚞𝚛 𝚘𝚝𝚑𝚎𝚛 𝙲𝙵𝙼𝙻 𝚏𝚒𝚕𝚎𝚜)
/𝚍𝚘𝚌𝚔𝚎𝚛
𝚌𝚘𝚕𝚍𝚏𝚞𝚜𝚒𝚘𝚗-𝟸0𝟸𝟷-𝚒𝚗𝚜𝚝𝚊𝚕𝚕𝚎𝚛.𝚋𝚒𝚗
𝚒𝚗𝚜𝚝𝚊𝚕𝚕.𝚜𝚑
𝚙𝚊𝚜𝚜𝚠𝚘𝚛𝚍𝚜.𝚝𝚡𝚝
𝙳𝚘𝚌𝚔𝚎𝚛𝚏𝚒𝚕𝚎
- /𝚊𝚙𝚙: This directory contains your ColdFusion application source code.
- /𝚍𝚘𝚌𝚔𝚎𝚛: This directory holds files needed for the Docker build process, such as the ColdFusion installer, installation scripts, and configuration files.
- 𝙳𝚘𝚌𝚔𝚎𝚛𝚏𝚒𝚕𝚎: This file is at the root of your project and defines the steps to build your custom Docker image.
2. Creating the 𝙳𝚘𝚌𝚔𝚎𝚛𝚏𝚒𝚕𝚎
The 𝙳𝚘𝚌𝚔𝚎𝚛𝚏𝚒𝚕𝚎 is the blueprint for your image. We will build it step by step. Create a file of 𝙳𝚘𝚌𝚔𝚎𝚛𝚏𝚒𝚕𝚎 in your project root.
Choosing a Base Image
Every Docker image starts from a base image. For a Java-based application like ColdFusion, a base image with a Java Runtime Environment (JRE) is a good choice. The official OpenJDK images are a popular option.
# 𝚂𝚝𝚊𝚛𝚝 𝚏𝚛𝚘𝚖 𝚊𝚗 𝚘𝚏𝚏𝚒𝚌𝚒𝚊𝚕 𝙾𝚙𝚎𝚗𝙹𝙳𝙺 𝚋𝚊𝚜𝚎 𝚒𝚖𝚊𝚐𝚎
𝙵𝚁𝙾𝙼 𝚘𝚙𝚎𝚗𝚓𝚍𝚔:𝟷𝟷-𝚓𝚛𝚎-𝚜𝚕𝚒𝚖
This line tells Docker to use a slim version of the OpenJDK 11 image, which provides a minimal environment to run Java applications.
Setting Up Environment Variables
Next, set up some environment variables for file paths and other configurations. This makes your 𝙳𝚘𝚌𝚔𝚎𝚛𝚏𝚒𝚕𝚎 easier to read and maintain.
# 𝚂𝚎𝚝 𝚎𝚗𝚟𝚒𝚛𝚘𝚗𝚖𝚎𝚗𝚝 𝚟𝚊𝚛𝚒𝚊𝚋𝚕𝚎𝚜
𝙴𝙽𝚅 𝙲𝙵_𝙸𝙽𝚂𝚃𝙰𝙻𝙻𝙴𝚁=”𝚌𝚘𝚕𝚍𝚏𝚞𝚜𝚒𝚘𝚗-𝟸0𝟸𝟷-𝚒𝚗𝚜𝚝𝚊𝚕𝚕𝚎𝚛.𝚋𝚒𝚗”
𝙴𝙽𝚅 𝙲𝙵_𝙸𝙽𝚂𝚃𝙰𝙻𝙻_𝙿𝙰𝚃𝙷=”/𝚘𝚙𝚝/𝙲𝚘𝚕𝚍𝙵𝚞𝚜𝚒𝚘𝚗𝟸0𝟸𝟷”
𝙴𝙽𝚅 𝙲𝙵_𝙸𝙽𝚂𝚃𝙰𝙽𝙲𝙴_𝙿𝙰𝚃𝙷=”${𝙲𝙵_𝙸𝙽𝚂𝚃𝙰𝙻𝙻_𝙿𝙰𝚃𝙷}/𝚌𝚏𝚞𝚜𝚒𝚘𝚗”
Copying Files and Running the Installer
Now, we need to copy the installer and our installation script into the image and then execute the installation.
First, let’s create the 𝚒𝚗𝚜𝚝𝚊𝚕𝚕.𝚜𝚑 script inside the /𝚍𝚘𝚌𝚔𝚎𝚛 𝚍𝚒𝚛𝚎𝚌𝚝𝚘𝚛𝚢. This script will run the ColdFusion installer in silent mode.
𝙵𝚒𝚕𝚎: /𝚍𝚘𝚌𝚔𝚎𝚛/𝚒𝚗𝚜𝚝𝚊𝚕𝚕.𝚜𝚑
#!/𝚋𝚒𝚗/𝚋𝚊𝚜𝚑
# 𝙼𝚊𝚔𝚎 𝚝𝚑𝚎 𝚒𝚗𝚜𝚝𝚊𝚕𝚕𝚎𝚛 𝚎𝚡𝚎𝚌𝚞𝚝𝚊𝚋𝚕𝚎
𝚌𝚑𝚖𝚘𝚍 +𝚡 /𝚝𝚖𝚙/${𝙲𝙵_𝙸𝙽𝚂𝚃𝙰𝙻𝙻𝙴𝚁}
# 𝚁𝚞𝚗 𝚝𝚑𝚎 𝚜𝚒𝚕𝚎𝚗𝚝 𝚒𝚗𝚜𝚝𝚊𝚕𝚕𝚊𝚝𝚒𝚘𝚗
/𝚝𝚖𝚙/${𝙲𝙵_𝙸𝙽𝚂𝚃𝙰𝙻𝙻𝙴𝚁} -𝚏 /𝚝𝚖𝚙/𝚙𝚊𝚜𝚜𝚠𝚘𝚛𝚍𝚜.𝚝𝚡𝚝
# 𝙲𝚕𝚎𝚊𝚗 𝚞𝚙 𝚝𝚑𝚎 𝚒𝚗𝚜𝚝𝚊𝚕𝚕𝚎𝚛 𝚏𝚒𝚕𝚎
𝚛𝚖 /𝚝𝚖𝚙/${𝙲𝙵_𝙸𝙽𝚂𝚃𝙰𝙻𝙻𝙴𝚁}
𝚛𝚖 /𝚝𝚖𝚙/𝚙𝚊𝚜𝚜𝚠𝚘𝚛𝚍𝚜.𝚝𝚡𝚝
You also need a passwords.txt file to automate the silent installation. This file provides the installer with the necessary passwords and configuration details. Refer to the Adobe ColdFusion documentation for the exact format, but it will look something like this:
𝙵𝚒𝚕𝚎: /𝚍𝚘𝚌𝚔𝚎𝚛/𝚙𝚊𝚜𝚜𝚠𝚘𝚛𝚍𝚜.𝚝𝚡𝚝
password=<your-admin-password>
…other installer properties…
With these files in place, add the following instructions to your 𝙳𝚘𝚌𝚔𝚎𝚛𝚏𝚒𝚕𝚎:
# 𝙲𝚘𝚙𝚢 𝚒𝚗𝚜𝚝𝚊𝚕𝚕𝚎𝚛 𝚏𝚒𝚕𝚎𝚜
𝙲𝙾𝙿𝚈 ./𝚍𝚘𝚌𝚔𝚎𝚛 /𝚝𝚖𝚙/
# 𝚁𝚞𝚗 𝚝𝚑𝚎 𝚒𝚗𝚜𝚝𝚊𝚕𝚕𝚊𝚝𝚒𝚘𝚗 𝚜𝚌𝚛𝚒𝚙𝚝
𝚁𝚄𝙽 /𝚋𝚒𝚗/𝚋𝚊𝚜𝚑 /𝚝𝚖𝚙/𝚒𝚗𝚜𝚝𝚊𝚕𝚕.𝚜𝚑
This 𝚍𝚘𝚌𝚔𝚎𝚛𝚏𝚒𝚕𝚎 config copies the entire /𝚍𝚘𝚌𝚔𝚎𝚛 𝚍𝚒𝚛𝚎𝚌𝚝𝚘𝚛𝚢 𝚝𝚘 /𝚝𝚖𝚙 inside the image, and then the RUN command executes our installation script.
Copying Your Application Code
Once ColdFusion is installed, you need to copy your application code into the web root of the ColdFusion instance.
# 𝙲𝚘𝚙𝚢 𝚝𝚑𝚎 𝙲𝚘𝚕𝚍𝙵𝚞𝚜𝚒𝚘𝚗 𝚊𝚙𝚙𝚕𝚒𝚌𝚊𝚝𝚒𝚘𝚗 𝚌𝚘𝚍𝚎
𝙲𝙾𝙿𝚈 ./𝚊𝚙𝚙 ${𝙲𝙵_𝙸𝙽𝚂𝚃𝙰𝙽𝙲𝙴_𝙿𝙰𝚃𝙷}/𝚠𝚠𝚠𝚛𝚘𝚘𝚝/
This command copies the contents of your local /app directory into the 𝚠𝚠𝚠𝚛𝚘𝚘𝚝 directory inside the container, making it available to the ColdFusion server.
Exposing Ports and Defining the Entrypoint
Finally, you need to tell Docker which ports your application listens on and what command to run when a container is started from the image. ColdFusion’s built-in web server typically runs on port 8500.
# 𝙴𝚡𝚙𝚘𝚜𝚎 𝚝𝚑𝚎 𝙲𝚘𝚕𝚍𝙵𝚞𝚜𝚒𝚘𝚗 𝚙𝚘𝚛𝚝
𝙴𝚇𝙿𝙾𝚂𝙴 𝟾𝟻00
# 𝙳𝚎𝚏𝚒𝚗𝚎 𝚝𝚑𝚎 𝚌𝚘𝚖𝚖𝚊𝚗𝚍 𝚝𝚘 𝚜𝚝𝚊𝚛𝚝 𝚝𝚑𝚎 𝙲𝚘𝚕𝚍𝙵𝚞𝚜𝚒𝚘𝚗 𝚜𝚎𝚛𝚟𝚎𝚛
𝙲𝙼𝙳 [“/𝚋𝚒𝚗/𝚋𝚊𝚜𝚑”, “-𝚌”, “${𝙲𝙵_𝙸𝙽𝚂𝚃𝙰𝙽𝙲𝙴_𝙿𝙰𝚃𝙷}/𝚋𝚒𝚗/𝚌𝚘𝚕𝚍𝚏𝚞𝚜𝚒𝚘𝚗.𝚜𝚑 𝚜𝚝𝚊𝚛𝚝 && 𝚝𝚊𝚒𝚕 -𝚏 /𝚍𝚎𝚟/𝚗𝚞𝚕𝚕”]
The EXPOSE command informs Docker that the container listens on port 8500. The CMD command starts the ColdFusion service and then uses tail -𝚏 /𝚍𝚎𝚟/𝚗𝚞𝚕𝚕 to keep the container running in the foreground. Without this, the container would exit immediately after the start script finishes.
The Complete 𝙳𝚘𝚌𝚔𝚎𝚛𝚏𝚒𝚕𝚎
Here is the complete 𝙳𝚘𝚌𝚔𝚎𝚛𝚏𝚒𝚕𝚎 for your reference:
# 𝚂𝚝𝚊𝚛𝚝 𝚏𝚛𝚘𝚖 𝚊𝚗 𝚘𝚏𝚏𝚒𝚌𝚒𝚊𝚕 𝙾𝚙𝚎𝚗𝙹𝙳𝙺 𝚋𝚊𝚜𝚎 𝚒𝚖𝚊𝚐𝚎
𝙵𝚁𝙾𝙼 𝚘𝚙𝚎𝚗𝚓𝚍𝚔:𝟷𝟷-𝚓𝚛𝚎-𝚜𝚕𝚒𝚖
# 𝚂𝚎𝚝 𝚎𝚗𝚟𝚒𝚛𝚘𝚗𝚖𝚎𝚗𝚝 𝚟𝚊𝚛𝚒𝚊𝚋𝚕𝚎𝚜
𝙴𝙽𝚅 𝙲𝙵_𝙸𝙽𝚂𝚃𝙰𝙻𝙻𝙴𝚁=”𝚌𝚘𝚕𝚍𝚏𝚞𝚜𝚒𝚘𝚗-𝟸0𝟸𝟷-𝚒𝚗𝚜𝚝𝚊𝚕𝚕𝚎𝚛.𝚋𝚒𝚗”
𝙴𝙽𝚅 𝙲𝙵_𝙸𝙽𝚂𝚃𝙰𝙻𝙻_𝙿𝙰𝚃𝙷=”/𝚘𝚙𝚝/𝙲𝚘𝚕𝚍𝙵𝚞𝚜𝚒𝚘𝚗𝟸0𝟸𝟷”
𝙴𝙽𝚅 𝙲𝙵_𝙸𝙽𝚂𝚃𝙰𝙽𝙲𝙴_𝙿𝙰𝚃𝙷=”${𝙲𝙵_𝙸𝙽𝚂𝚃𝙰𝙻𝙻_𝙿𝙰𝚃𝙷}/𝚌𝚏𝚞𝚜𝚒𝚘𝚗”
# 𝙲𝚘𝚙𝚢 𝚒𝚗𝚜𝚝𝚊𝚕𝚕𝚎𝚛 𝚏𝚒𝚕𝚎𝚜
𝙲𝙾𝙿𝚈 ./𝚍𝚘𝚌𝚔𝚎𝚛 /𝚝𝚖𝚙/
# 𝚁𝚞𝚗 𝚝𝚑𝚎 𝚒𝚗𝚜𝚝𝚊𝚕𝚕𝚊𝚝𝚒𝚘𝚗 𝚜𝚌𝚛𝚒𝚙𝚝
𝚁𝚄𝙽 /𝚋𝚒𝚗/𝚋𝚊𝚜𝚑 /𝚝𝚖𝚙/𝚒𝚗𝚜𝚝𝚊𝚕𝚕.𝚜𝚑
# 𝙲𝚘𝚙𝚢 𝚝𝚑𝚎 𝙲𝚘𝚕𝚍𝙵𝚞𝚜𝚒𝚘𝚗 𝚊𝚙𝚙𝚕𝚒𝚌𝚊𝚝𝚒𝚘𝚗 𝚌𝚘𝚍𝚎
𝙲𝙾𝙿𝚈 ./𝚊𝚙𝚙 ${𝙲𝙵_𝙸𝙽𝚂𝚃𝙰𝙽𝙲𝙴_𝙿𝙰𝚃𝙷}/𝚠𝚠𝚠𝚛𝚘𝚘𝚝/
# 𝙴𝚡𝚙𝚘𝚜𝚎 𝚝𝚑𝚎 𝙲𝚘𝚕𝚍𝙵𝚞𝚜𝚒𝚘𝚗 𝚙𝚘𝚛𝚝
𝙴𝚇𝙿𝙾𝚂𝙴 𝟾𝟻00
# 𝙳𝚎𝚏𝚒𝚗𝚎 𝚝𝚑𝚎 𝚌𝚘𝚖𝚖𝚊𝚗𝚍 𝚝𝚘 𝚜𝚝𝚊𝚛𝚝 𝚝𝚑𝚎 𝙲𝚘𝚕𝚍𝙵𝚞𝚜𝚒𝚘𝚗 𝚜𝚎𝚛𝚟𝚎𝚛
𝙲𝙼𝙳 [“/𝚋𝚒𝚗/𝚋𝚊𝚜𝚑”, “-𝚌”, “${𝙲𝙵_𝙸𝙽𝚂𝚃𝙰𝙽𝙲𝙴_𝙿𝙰𝚃𝙷}/𝚋𝚒𝚗/𝚌𝚘𝚕𝚍𝚏𝚞𝚜𝚒𝚘𝚗.𝚜𝚑 𝚜𝚝𝚊𝚛𝚝 && 𝚝𝚊𝚒𝚕 -𝚏 /𝚍𝚎𝚟/𝚗𝚞𝚕𝚕”]
A note on 𝚍𝚘𝚌𝚔𝚎𝚛𝚏𝚒𝚕𝚎 license: When using Adobe ColdFusion, you are still bound by its licensing terms. The Docker image you build must include a valid license. For development, you can use the developer edition. For production, you will need to provide a valid license key, which can often be passed in during the silent installation process.
Building and Running Your Docker Image
With your 𝙳𝚘𝚌𝚔𝚎𝚛𝚏𝚒𝚕𝚎 and supporting files in place, you can now build your Docker image. Open a terminal in your project’s root directory and run the following command:
𝚍𝚘𝚌𝚔𝚎𝚛 𝚋𝚞𝚒𝚕𝚍 -𝚝 𝚖𝚢-𝚌𝚏-𝚊𝚙𝚙:𝟷.0 .
- 𝚍𝚘𝚌𝚔𝚎𝚛 𝚋𝚞𝚒𝚕𝚍: The command to build a Docker image.
- -𝚝 𝚖𝚢-𝚌𝚏-𝚊𝚙𝚙:𝟷.0: This tags your image with a name (𝚖𝚢-𝚌𝚏-𝚊𝚙𝚙) and a version (1.0).
- .: This tells Docker to use the current directory as the build context.
Docker will now execute the steps in your 𝙳𝚘𝚌𝚔𝚎𝚛𝚏𝚒𝚕𝚎. This may take some time, especially the ColdFusion installation step.
Once the build is complete, you can run a container from your newly created image:
𝚍𝚘𝚌𝚔𝚎𝚛 𝚛𝚞𝚗 -𝚍 -𝚙 𝟾𝟻00:𝟾𝟻00 –𝚗𝚊𝚖𝚎 𝚖𝚢-𝚛𝚞𝚗𝚗𝚒𝚗𝚐-𝚊𝚙𝚙 𝚖𝚢-𝚌𝚏-𝚊𝚙𝚙:𝟷.0
- 𝚍𝚘𝚌𝚔𝚎𝚛 𝚛𝚞𝚗: The command to create and start a container.
- -𝚍: Runs your container in separate mode (in the background).
- -𝚙 𝟾𝟻00:𝟾𝟻00: Maps port 8500 on your host machine to port 8500 in the container.
- –𝚗𝚊𝚖𝚎 𝚖𝚢-𝚛𝚞𝚗𝚗𝚒𝚗𝚐-𝚊𝚙𝚙: Assigns a name to your running container.
- 𝚖𝚢-𝚌𝚏-𝚊𝚙𝚙:𝟷.0: The image to use for the container.
Your containerized ColdFusion application should now be running! You can access it by opening a web browser and navigating to http://localhost:8500.
Advanced Considerations and Best Practices
The steps above provide a basic foundation for containerizing a ColdFusion application. For a production-ready setup, consider these advanced topics.
Managing Configuration and Secrets
Hardcoding configuration details like database credentials or API keys into your Docker image is a security risk. A better approach is to manage them as external configurations. Docker supports several methods for this:
- Environment Variables: You can pass configuration values to your container at runtime using the -e flag with docker run. Your ColdFusion application can then read these values using 𝚐𝚎𝚝𝚂𝚢𝚜𝚝𝚎𝚖𝚂𝚎𝚝𝚝𝚒𝚗𝚐().
- Docker Secrets: For more sensitive information, Docker Swarm and Kubernetes provide built-in support for managing secrets. These secrets are mounted into the container as files, providing a secure way to handle credentials.
Integrating with a Web Server
While ColdFusion’s built-in web server is great for development, a dedicated web server like Nginx or Apache is recommended for production. You can use Docker Compose to run a multi-container application, with one container for your ColdFusion application and another for the web server. The web server would act as a reverse proxy, forwarding requests to the ColdFusion container. This setup also simplifies tasks like SSL termination and serving static assets.
Using Official Docker Images
Building your own ColdFusion image from scratch provides maximum control, but it can be complex. There are official and community-supported Docker images available on Docker Hub for both Adobe ColdFusion and Lucee (an open-source CFML engine). Using these pre-built images can significantly accelerate your ColdFusion development and deployment process. These images are often optimized for size and security and come with sensible defaults. They can be a great starting point, which you can then customize using your own 𝙳𝚘𝚌𝚔𝚎𝚛𝚏𝚒𝚕𝚎 that builds upon the official image.
Building a DevOps Pipeline
The real power of containerization is realized when it’s integrated into a CI/CD pipeline. Here’s a conceptual DevOps workflow:
- Code: A developer pushes code changes to a Git repository.
- Build: A CI server (like Jenkins or GitLab CI) detects the push, checks out the code, and runs a docker build command to create a new image.
- Test: The CI server spins up a container from the new image and runs automated tests against the ColdFusion application.
- Push: If tests pass, the CI server tags the image and pushes it to a container registry (like Docker Hub or AWS ECR).
- Deploy: A CD tool (like Argo CD or Spinnaker) detects the new image in the registry and automatically deploys it to the production environment by updating the running containers.
This automated process ensures that every code change is thoroughly tested and deployed in a consistent and reliable manner, embodying the principles of modern DevOps development.
When to Hire a ColdFusion Developer
While this guide provides a comprehensive overview, containerizing a complex enterprise software solution can be challenging. If your team lacks experience with modern Docker or DevOps practices, it may be beneficial to hire a ColdFusion developer with expertise in this area. An experienced developer can help you navigate the nuances of ColdFusion migration, optimize your Docker images for performance and security, and set up a robust CI/CD pipeline. This investment can pay dividends in the long run, leading to a more stable and scalable ColdFusion application.
Conclusion
Containerizing your ColdFusion application with Docker is a strategic move that aligns this mature and powerful platform with modern software development and deployment practices. By creating a portable, consistent, and scalable environment for your application, you can significantly improve your development workflow, simplify maintenance, and enhance the overall reliability of your web app development process.
Whether you are performing a ColdFusion migration for a legacy system or building a new application with an eye toward ColdFusion 2025, a Docker-based strategy is essential. The journey from a traditional deployment model to a fully containerized, automated workflow requires effort, but the payoff, in terms of speed, stability, and scalability, is well worth it. By following the steps outlined in this guide, you are well on your way to unlocking the full potential of your ColdFusion applications in a containerized world.
More on ColdFusion
 ColdFusion vs Modern Backend Frameworks: Performance, Security & Cost Comparison
 Adobe ColdFusion Security Best Practices 2026: Patches & Hardening
 ColdFusion Modernisation & Performance in 2026
 How to Migrate from ColdFusion to Lucee 6 Without Breaking Your App?
 Why ColdFusion Still Belongs in Modern DevOps Workflows?
Let’s Build Together
Ready to Build Something Intelligent?
Transform your vision into reality with AI-powered solutions. Schedule a free consultation with our experts and discover how we can accelerate your digital transformation.
Free Consultation
No Obligation Quote
48-Hour Response